AsadAbrar
International Coach
Today I will tell you all how to make an easy two frames animation.
Requirements:
1.Photoshop CS4, I used Photoshop CS5, i don't know if this feature is in earlier versions or in any photo editor. You can also use Image ready but you will have to Google for the tutorial!
2.Some good pictures...
This tutorial is for avatar animation, you can use this to make any type of animation for eg animated signature.
Ok so get some pictures.For animated avatars i recommend 2-5 pictures and for animated signatures 2-3 pictures are great!I will use 4 pictures for my animated avatar of Pakistani players.
Step 1: Make a new psd file of 100*100.
Step 2: Place all your images and resize them.
Step 3: Now open the Window tab and then press Animation! Reference picture:

Step 4: Now when the animation tab opens, left click this icon
 and click the "Convert to Frame animation" option. Reference picture:

Step 5: Now press this button
 . Reference picture:
 Step 6: Now write click on the second frame and there will be three options:
Step 7: Change the time it will stay for e.g 1 sec or 5 sec. I recommend 1 sec. stay is good. Reference picture:

Step 8: Now click on the second frame and hide the first layer. Do this for all frames, Click next frame and hide previous layers. After doing this method, all your layers will have different pictures!
Step 9: Now click this icon
 to play and check that no picture is repeated and the time is right.
Step 11: Go to the File tab and Press Save for Web and devices... and save with these options,reference picture:

<----Tutorial complete---->
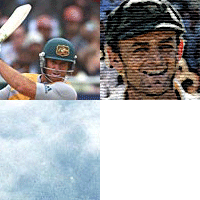
Here is the avatar i made during the tutorial:

Requirements:
1.Photoshop CS4, I used Photoshop CS5, i don't know if this feature is in earlier versions or in any photo editor. You can also use Image ready but you will have to Google for the tutorial!

2.Some good pictures...
This tutorial is for avatar animation, you can use this to make any type of animation for eg animated signature.
Ok so get some pictures.For animated avatars i recommend 2-5 pictures and for animated signatures 2-3 pictures are great!I will use 4 pictures for my animated avatar of Pakistani players.
Step 1: Make a new psd file of 100*100.
Step 2: Place all your images and resize them.
Step 3: Now open the Window tab and then press Animation! Reference picture:

Step 4: Now when the animation tab opens, left click this icon

Step 5: Now press this button

- Automatic (which will be ticked
- Do not Dispose
- Dispose
Step 7: Change the time it will stay for e.g 1 sec or 5 sec. I recommend 1 sec. stay is good. Reference picture:

Step 8: Now click on the second frame and hide the first layer. Do this for all frames, Click next frame and hide previous layers. After doing this method, all your layers will have different pictures!
Step 9: Now click this icon
Step 11: Go to the File tab and Press Save for Web and devices... and save with these options,reference picture:

<----Tutorial complete---->
Here is the avatar i made during the tutorial:

Last edited:


 Read my previous post!
 :hpraise
