deathrevenge9
International Coach
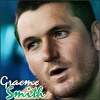
Today I will show you how to make an Avatar like this:

Outcome so far:

Step 1: Create a New document 100x100 px.
Step 2: Place in your stock and resize it so that it looks good.
Step 3: Duplicate your stock 3 times.
Step 2: Place in your stock and resize it so that it looks good.
Step 3: Duplicate your stock 3 times.
- Bottom Layer: Desaturate it (crtl+shft+U) and give it a Gaussian Blur of 2.0px
- Second Layer: Set in on Hard Light,Opacity 60%
- Third Layer: Set this on Overlay (You can play with the opacity if you want)
- Top Layer: Normal. Opacity:58%, Fill:81%
Outcome so far:
Step 4: Add a 'Black and White' Gradient Map and set in on Soft Light with Opacity 100% and Fill 46%.
Outcome so far:

Step 5: Now add Curves and set the Input,Output Values as required (I have set the Input on 90 and Output on 95).
Outcome so far:

Step 6: Now its time for some lightning.For this purpose make a New Layer.Take a soft brush 60px using white colour,brush the parts you thing needs a little bit of lightning.Then set this layer on Soft Light (You can use different colours for lightning by creating different layers as I have done using White and Green colours).
Outcome so far:

Step 7:Create a New Layer,then Image -> Apply Image.
Step 8: Now we shall add a 'Selective Colour' Layer.Keep the settings as shown in the pic:
Step 8: Now we shall add a 'Selective Colour' Layer.Keep the settings as shown in the pic:
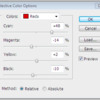
(You can change the settings according to your requirement)
Step 9:Now add border.For this purpose,make a New Layer and fill it with any colour.Then decrease its fill to 0% and add 'Stroke' of 1px (Center).
Step 10 (optional):The 10th and the Last step is adding the Text.You can do it yourself .
.
Step 10 (optional):The 10th and the Last step is adding the Text.You can do it yourself
.
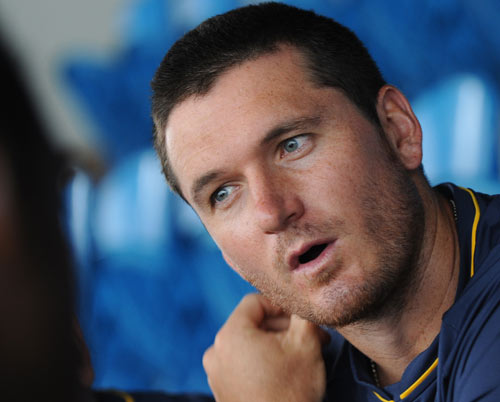
And here is the Original Picture:
My Other Outcome:


Waiting for your comments and outcomes
") .
.Note:This is my first Tutorial,so forgive me if there are any mistakes
Last edited:


