Just a heads up, I've decided not to upload the tutorial, as firstly its not up to my own standards, secondly, I can't be bothered dealing with the inevitable questions asking about the process, and finally, I don't play cricket 19 anymore, and don't really think about it tbh - hence my interest in plafyfaces ain't there anymore, and lets be honest most people have moved on from cricket 19 anyway so I don't feel it would reach an audience wide enough to help the game, when wasteyouryouth and others have pretty much done everything in the academy anyway lol.
I'll probably do another one for the next cricket game, provided its the same, or very similar process to the one now. If the game shifts more towards a blender style of face creation rather than photoshop then I won't do one as I don't do 3d software. In any case, my apologies if I got anyone's hopes up.
My quick tips are:
Tools: Photoshop & Wacom tablet (far easier) mine is a simple $100 one, that's all you need really unless you use one professionally.
Quick process:
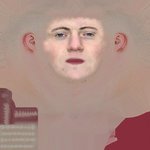
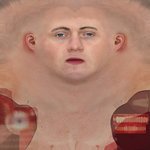
Type the player or face you want with stock photo in google search (normally getty images) and get a few from there (there's a filter for head shots). They're the best quality ones. Now in photoshop, use the manual selection to get the whole face and half the forehead (no hair). Then its a matter of using waste's template, find the right colour tone (I use a brightness/contrast to adjust skin colour and saturation for a bit more control). Edit: I tend to cut out the lips from the source image as they tend to be too big for the template. From there merge the two layers (face and template skin) and use clone stamp to match up the skin tone. Doesn't need to be perfect, just try and limit the colour differences. (bear in mind sometimes it won't work as well, in which case I just clone stamp the entire face to match the cheek area skin tone)
This is Liam Tervaskis as an example where I just got rid of some rough edges very quickly. (bearded players are a bit more time consuming)

Then I select another skin layer, place it below the original one and switch it on. Then the original layer I choose one of the layer blending options (normally soft light, or darken, not exclusively as it does vary and technically I go with which ever one looks good - from the entire drop down list). From there I tend to erase the bottom layer's nose and eyes as they will be covered by the second layer. From there I select the top layer and use the clone stamp again and touch up the eyes and nose to match the colour tones.


