Tutorial: Ali's Tutorials - Avatar Tutorial(Video)

Does it work?


  • Total voters
    14

AliB

ICC President
India
AFG...
Mumbai Indians
PlanetCricket Award Winner
Adelaide Strikers
X Rebels
Joined
Oct 7, 2014
Online Cricket Games Owned
  1. Don Bradman Cricket 14 - Steam PC
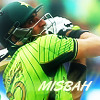
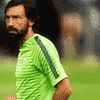
Hi folks, I received a request on writing a tutorial on this avatar:
ZxlHmEx.png


1.We'd obviously start with a new Canvas of 100x100 with resolution of 72.Open your stock and place it properly.
2.Duplicate the stock twice, Now you have 3 layers(Top, Middle & Bottom)
Bottom - Leave it as it is.
Middle - Filter>Blur>Gaussian Blur>5px at Screen with Opacity 100% and Fill 69%
Top - Desturate it (Ctrl+Shift+U) at Soft Light.

If you follow those two steps correctly, You'll get something similar to this:
upload_2015-6-10_10-29-1.png

3.Now take a soft brush of 90 px at color black and paint from the top right to the mid of the bottom.
4.Take selective colors and chose a color similar to your stock. For me it's green withis setting:
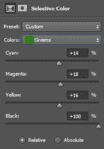
upload_2015-6-10_10-33-1.png
5.Take a soft brush of 150 px with the color white Click on top right of the avatar. Change blending mode to Screen at 90% Fill
6.Place this texture at Color Dodge with 42% Fill.
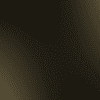
upload_2015-6-10_10-34-6.png

After this you'll get outcome similar to:
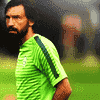
upload_2015-6-10_10-38-48.png

7.Take a B/W Gradient Map at Screen with 44% Fill.
8. Add Curves with following placement:
upload_2015-6-10_10-41-44.png
9. You're almost done now. Take 89px Soft Brush with the color [HASHTAG]#c7ff00[/HASHTAG] at Screen with 31% Fill.

10. Add this texture at Soft Light with 44% Fill.(Optional)
upload_2015-6-10_10-45-27.png
We are done. Your Andrea Pirlo Avatar is ready. Do post your outcomes.
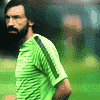
upload_2015-6-10_10-47-19.png
 
Great Tutorial.
My outcome!
Misbahoutcome.png
 
Imperfect text plcement, no need of that. Overall great.
I also thought that. i don't need to place text. anyway thanks for Good feedbacks... :thumbs:thumbs
 
Here's a kit making tutorial on the request of @themusketeer .
So, it is quite easyt to make a kit(t-shirt) with photoshop, as this is a tutorial for beginners, we are not going in-depth regarding that.

Things needed:
  • Photshop
  • Kit template(attached)[its not my property at any cost I've got it from @EARAgAV and it isn't his as well]
  • Logos of the team sponsors and off course the team

Let's start!

  • Open the kit template (adidas-50-52.psd) in Photoshop. And all the logos in different tabs.
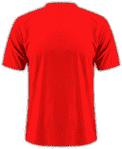
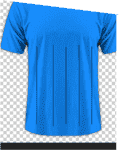
  • There you'll find three different folders(50, 51, 52), it's preferred hiding those and working on base. the Base layer(layer 97) has a color overlay which features the color of the kit, just change it to your desired one.(Let's take the color red)
  • upload_2015-11-10_0-51-14.png
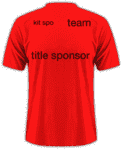
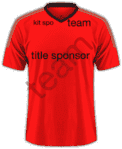
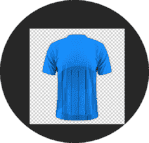
  • Make a new layer and paste the the team logo on the right and the kit sponsor on left.
  • upload_2015-11-10_0-54-3.png
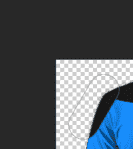
  • Unhide any of the 50/51/52 folder and keep the collar folder unhidden and hide all the others. Change all the colors(in color overlay) to black(you can use your own)
  • upload_2015-11-10_0-57-32.png
  • Add some design on the sleeves and add a less opaque team logo at a large size at the center.
upload_2015-11-10_0-59-57.png
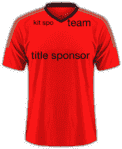
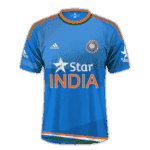
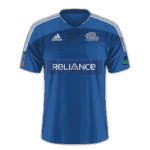
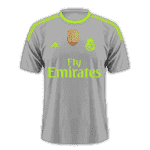
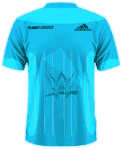
Your basic kit is ready! While you can add some extra effects like these:
i.png mi.png rmaway.png rmhome.png


Attachments

  • Adidas-50-52).psd
    1.6 MB · Views: 52
Good and Simple one. But i need to learn, how to create different base patterns. That's what i wanted.


Anyone knows how to create those @User2010 .
 
Good and Simple one. But i need to learn, how to create different base patterns. That's what i wanted.


Anyone knows how to create those @User2010 .
You told for noobs, so I did this, I'll write a part 2 for that if you want. :)
 
Here's a kit making tutorial on the request of @themusketeer .
So, it is quite easyt to make a kit(t-shirt) with photoshop, as this is a tutorial for beginners, we are not going in-depth regarding that.
Things needed:
  • Photshop
  • Kit template(attached)[its not my property at any cost I've got it from @EARAgAV and it isn't his as well]
  • Logos of the team sponsors and off course the team

Let's start!
  • Open the kit template (adidas-50-52.psd) in Photoshop. And all the logos in different tabs.
  • There you'll find three different folders(50, 51, 52), it's preferred hiding those and working on base. the Base layer(layer 97) has a color overlay which features the color of the kit, just change it to your desired one.(Let's take the color red)
  • Make a new layer and paste the the team logo on the right and the kit sponsor on left.
  • Unhide any of the 50/51/52 folder and keep the collar folder unhidden and hide all the others. Change all the colors(in color overlay) to black(you can use your own)
  • Add some design on the sleeves and add a less opaque team logo at a large size at the center.
View attachment 156377
Your basic kit is ready! While you can add some extra effects like these:
View attachment 156378 View attachment 156379 View attachment 156380 View attachment 156381


A follow up for this

How to design patterns for the jersey?

There are many ways and different patterns for the jerseys, like, lines, circles, animals roaring, etc.
For the lines, here's a simple way to draw lined patterns:
upload_2015-11-10_11-55-0.png

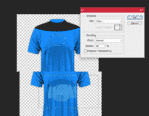
Draw some parallel lines and pl;ace them up and down.
upload_2015-11-10_11-59-50.png

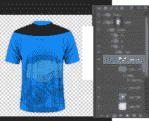
Add some effects to the borders:
upload_2015-11-10_12-3-41.png
Now moving to the second part, adding some circle like effects:
Select ellipse marquee tool and in a new layer drag that to the upper half and fill with the color you want
upload_2015-11-10_12-6-31.png


Now cut a bit of color from the collar
upload_2015-11-10_12-7-53.png

Now add some less opaque circle/lines

upload_2015-11-10_12-9-57.png
Change the position, shape, etc and the color overlay it at your desired color which can be combinated with the primary BG.

upload_2015-11-10_12-13-39.png

You can also try related animal roaring *let's take A tiger:
roar-clipart-roar.gif

Desturate it and place it at Multiply at a suitable opacity:

upload_2015-11-10_12-18-28.png

Add some rounded rectangles on the sleeves at a radius of 40 px:
upload_2015-11-10_12-19-57.png
upload_2015-11-10_12-22-2.png
Add the same on the other one. And it's all ready!

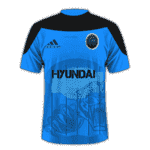
So after placing logos:
Adidas-50-52.png
 

Users who are viewing this thread

Top